Monday, November 12, 2007

Long weekend is done...

We're back from camping!! Nice trip, but COLD!!!! Needless to say, sewing was not on the agenda.

Instead, here's my writeup, finally, on Simplicity 3775. As I mentioned in the previous post, I really like how it turned out.


Let's take the easy way out and use PatternReview's breakdown...

Pattern Description:
This pattern is for a knit dress in 6 variations. I did View B, which is the one with the waist ties, but with the sleeves from View C.

Pattern Sizing:
I started with size 18 and altered for fit. I increased the arm width, waist width, and hip width. I added a tad bit extra to the width of the skirt so it would be just a bit fuller.

Did it look like the photo/drawing on the pattern envelope once you were done sewing with it?
Yeah, I think so. Hard to tell sometimes when the models are so fit and I'm so not!

Were the instructions easy to follow?
Instructions were easy-peasy. Only I didn't follow them exactly. I changed the order of construction so that I could sew the sleeves in flat.

One note, the waist ties turned out rather long. I've read other reviews were folks had to tighten these up and I had to do the same. I ended up taking about 4 inches off the length of the ties so they would lie flat instead of sagging.

What did you particularly like or dislike about the pattern?
I really like the swishyness of the skirt.

Fabric Used:
Japanesque from Gorgeous Fabrics. This is a very nice knit. I love the print. You can't really see it in the picture, but it has some nice gold highlights in it.

I did have to be careful sewing it as it's pretty stretchy. I starched all the edges heavily before sewing to stabilize them.

Would you sew it again? Would you recommend it to others?
I think I may sew this up again; maybe try one of the other views. Although, I'm not sure what luck I would have with any of the cross-over styles. The last cross-over style I tried didn't work out all that well.

Conclusion
Did I mention that I haven't worn a dress in years? I think the last time was over two years ago and it was for a job interview. But dresses were so very popular this past summer and every one's was so cute, I just had to try one too. I was not disappointed - a little late to the game, but not disappointed. This dress' popularity is thoroughly understandable.

Sunday, November 04, 2007

PowerDry and Flannels

I feel like I'm so behind. I can't seem to catch up on my project or my blog reading.

I did finish up Simplicity 3775 during the week, but DH has run off with the camera so I won't be able to do my writeup until a little later. I will say that I'm really pleased with how it turned out.


In the meantime, I've started working on this pile.


This is some PowerDry and Flannel that I got from the FabricandNotions yahoo coop. There are 24 yards there altogether. Everything is washed and ready to go.


I'm starting with the PowerDry first. I've started cutting out DS' tees (Kwik Sew 3043). DD has grown so much in the past few months that I'm going to have to re-do her pattern with the next size. I'll either do that next or cut out my tees. And I never did make up a muslin with DH's pattern, so I'll need to do that real quick before I cut into the good stuff for his tees.


I sure wish I had gotten this started a little sooner. We're off for a long weekend in the woods this next weekend and it would be nice to have a few of our new shirts done. But I don't think that's destined to happen, as I've spent a huge chunk of this weekend babysitting my two-year-old nephew.

Once the t-shirts are done, I'll dig into the flannel. The little doggies are for DS, the flowers are for DD, the leaves for DH, and the "Queen of sparkle" is for me. At my rate, It'll be spring before I actually get these done! HAHA!!!

Sunday, October 14, 2007

Simplicity 3775 - Muslin is complete

I actually finished something!!! YAY!!!


Well, sort of. I finally finished a muslin of Simplicity 3775. It came out pretty nice too. If I can find a nice slip for it, it may even become a wearable muslin.

Here are the particulars:
  • View B with C sleeves
  • started with size 18
  • increased arm width by 1 and 1/2"
  • increased waist by 3"
  • increased hip by 3"

The only hangup I had during the process was with the waist ties. They were way too long and hung down dreadfully. I ended up removing about 4" from each tie in order to get it to fit correctly. Weird. Whatever.

I mostly followed the directions. One of the changes I made was to add fusible knit not only to the shoulder seams, but around the back of the neckline as well. I would like to give credit for the idea - but I can't find the particular blog entry I found that in from the 70+ blogs I follow.

So to whomever I got that idea from, THANKS!!! :)

I also choose to sew the bodice and waist pieces together first, then sewed the the sleeves in flat, then attached the skirt in last. The instructions have you put the front and back bodice pieces together, then set in the sleeves. I like sewing sleeves in flat better, so I did it my way instead.

I've already started cutting out and marking the "real" thing.

Saturday, September 22, 2007

Crochet Wrap/Shrug Thing

I have not sewn anything in sooooooo long.

I got rather caught up in an unexpected project.

Here is the end result:

From Wrap it up


This is a crocheted "shrug", "wrap", whatever you want to call it. The idea for it came from the "two-minute instant shrug" article in volume 1 of SewStylish, and is intended to replace my fugly grey office sweater.


Using their directions, and lengthening a little bit, I came up with this muslin.


I wasn't crazy about the muslin fabric, so I went hunting for something else I would like. I had a hard time finding anything that spoke to me, so I ended up crocheting my own fabric. I'm still not 100% statisfied with the results, but the wrap/shrug is cosy and wearable.

Here's how I made it (I'm not a professional crochet designer, nor practitioner, so take these for what they are):

Row 1. Chain 35.
Row 2. Skip 1st ch, sc in next 34.
Row 3. ch 1, turn, sc in 34 sc through the front loop.
Row 4. ch 1, turn, 2 sc in 1st sc, sc in all but the last sc, 2 sc in last sc, all through the back loop
Rows 5 through 30, repeat row 4, alternating front and back loops so that you always pick up the loop on the same side. This will form little ridges across the work all on the wrong side.
Rows 31 through 53 - sc in all sc.
Rows 54 through 80 - decrease in the first and last sc and sc in the remaining sc.

Finish off.

This will give you a piece of fabric that looks roughly like this:


Fold the piece of fabric in half and crochet or whip stitch along the angles to form the sleeves.

As you can see from the pictures, I did a little extra. I can't explain that part formally though. I made a few spirals with a big glass bead in the middle. I worked those in to the middle rows (the ones that were all the same size) by attaching them at the bottom during one pass, then going around the top and back down during the next pass, then filling in on one side of them, then filling in the other.

One more thing. I didn't actually turn the work as I went. I'm left handed and can crochet left and right handed. So I always kept the right side of the work facing me and switched hands as I went back and forth. This also means that I didn't alternate the front and back loops as the instructions indicated. I always worked the front loops so that the ridge would go to the back.

I'm not even going to get into how I ended up going down this path. It's a long, long saga. Part of it included experimenting with different crochet and knit stitches while on vacation - done because I couldn't drag my sewing machine with me.

I'm glad to be done with this thing so I can get back to my sewing.

Wednesday, September 05, 2007

Three aspects of life meet...

I am always fascinated by the odd little coincidences of life.

Before I began sewing, I had never heard of "bespoke" clothing. I gathered from my reading that it was custom tailoring, and didn't really think anymore about it.

Then this morning, while reading through one of my geek newsgroup posts (having to do with the Eclipse Process Framework Project for anyone who might be remotely interested), I came across the term "bespoke proccesses". Here's the full quote:
This tailoring of the available process body of knowledge will result in bespoke
processes suitable for a specific project execution environment.

Hmmm... now we've used both "tailoring" and "bespoke" in reference to software development processes - something of a distance from sewing.

So, onto to wikipedia, where we find that "bespoke" clothing is customized made-to-order clothing, and "bespoke" software is customized, made-to-order software. Interesting.

Interesting to find another little tie between my "day job" and sewing.

Interesting that "bespoke" is not more widely used in other areas. Clothing, software, and automobile manufacturing are pretty much it.

Interesting that the reason I've not heard the term "bespoke software" before, for all that I've been in the software industry for 15+ years, is that it's not really used much in the US.

And "bespoke" is just an interesting little word all by itself. It's right up there with "piffle".

So there you have it, three aspects of my life; sewing, computers, and interesting words - all tied up together in one neat little package.

OK OK, I fully admit it. I'm sometimes fascinated and amused by both the minute and odd. :-)

Sunday, August 26, 2007

Catching up...

Hello everyone!

I haven't posted in a while, so I thought I'd do a little catching up.

First off, vacation was really nice. We did lots of swimming, some walking, and even a little kayaking.

And even though I didn't get to do any actual sewing, I did do a few little experiments along the lines of embellishment.

Experiment #1: Beaded embroidery

I really like the look of beaded embroidery on garments and it's something I want to try to do sometime. But, I've only done a little bit of embroidery before, and never with beads. So I played a bit with some scrap fabric and a few beads. Here are the results.

This took me an afternoon to work up and I generally like how it turned out. Most of all, the beading itself wasn't too difficult and I think I could incorporate beaded embellishment easily enough.

Experiment #2: Crochet trim

I've also seen crocheted, or crochet-like trims on garments, and wanted to play a bit with that too. Just before vacation, I picked up a book called 150 Crochet Trims. There are a few designs that incorporate beads. Here's one I tried.

I like how this turned out as well. I can see using something like this sometime.

There is an Experiment #3, but it will take a while to go through, so I'll save that for another post.

As for Simplicity 3775, I have finished sizing and tracing the pattern, and I've gotten some muslin fabric for it, but Experiment #3 has co-opted all my sewing time since vacation. Soon though, soon!

Friday, August 10, 2007

If you haven't been following along, check out the series of posts on the Sartorialist about the stylistic differences between Fred Astaire and Cary Grant.

I think it's comparing apples and oranges myself. And I'm certainly, certainly NOT going to try to pick between the two. I'll take them both thanks :-)

What you can't argue with is that both actors have what DH and I call "Face". It's a characteristic that embodies their presence, the way they carried themselves and their sense of style. It's something they had inside that made it possible to take what might otherwise be an ordinary face and turn it into something admirable.

Humphrey Bogart is a prime example of someone who was not particularly good looking, but who had beautiful Face. Grant was someone who was naturally good looking, but turned it into something more with his Face.

One of the things that gave so many of the actors and actresses of that era their Face, at least in part, was the fact that they didn't shlump about, as so many people do today. They carried themselves with a willful grace - erect, upright and ready to face the world. I think people have forgotten just how much personal power you get when you carry yourself like you mean it.

Monday, August 06, 2007

Sew little

There is sew little going on. I got to look at my sewing table a few times this weekend and that was about it. Life had other plans for me. Not bad plans mind you, just not ones that involved sewing.

I'm still in the measuring and tracing process for Simplicity 3775 . Did I mention the part about never having made a dress before? So what do I do? Do I pick a "standard" sort of dress to make? Oh no. I've got one that comes with pieces parts that are different from the ones in the books.

In this pattern, there is a bodice piece that ends just below the bust, a waist piece that covers from there to just below the waist, and the skirt piece which starts below the waist. To make it more challenging, the bodice gets gathered in front where it attaches to the waist piece.

It's making my standard "increase the width in the waist and hips" adjustments interesting. To top it off, I think I would like to add some fullness to the skirt. I took some pictures of my fabric laying flat, and then gathered, and I really like the look of the gathering. I also think a little extra fullness would be more flattering for my figure. I've been wishy-washy about this last part though, so I've done a lot of staring, but not much tracing.

It's the last bit to be traced and then I can move on to making a muslin.

Chances are though that it won't happen this week. Which means it won't happen for probably another two weeks. We're going on vacation next week, and it's not the kind where I can haul my sewing things along (AAACCCKKK!!!!!!!!). So that kills this weekend, next week and the weekend after as far as sewing goes.

Ah well, I'll take some crafty things along with me to fill the void and dream about sewing :-)

Thursday, July 26, 2007

Nevermind the maneuvers, just go straight at them - Lord Nelson

I decided to move forward with the Simplicity 3775 using the Japonesque fabric. I think it will look very nice.

Thank you Geek, Adrienne, and Ann for your encouraging words. They were much appreciated.

I'm in the process of measuring and tracing the pattern, but it's going to take some time. We are rolling out a new system at work at the end of August, and I'm in the middle of developing training materials and helping out with training classes. I've only had to work a few extra hours, but the work is exhausting and there hasn't been much energy leftover by the time I get home. Just enough to eat a little something and lift a glass of wine ;)

Monday, July 23, 2007

Awww man!! That's my dress...

I'm feeling a little like the gal who's gone to a fancy party only to find that my "one of a kind" isn't.

I've been letting the idea of using Simplicity 3775 with my Japonesque fabric stew around for a while. In particular, View B with View C sleeves. I even worked up a picture of it like I did yesterday for Simplicity 6429.

Then I poked around on Pattern Review to see what kind of work has been done with that pattern and what do I find? Take a look at a review of Simplicity 3775 by mahalosu.

Not quite the same view - but the same pattern and same fabric. Heavy, heavy sigh.

(mahalosu's version looks great btw)

So what do I do now?

I'm thinking I'm going to make mine as planned and just not review it on PR. Of course, I'll put notes in about it here. Yeah, there's going to be a certain amount of "that's been done", but I don't think I'll actually be running into mahalosu in person any time soon :)

I've put a lot of thought already into my two planned dresses. I've stared for hours and hours at different patterns and both me and my fabric are growing happier and happier with the choices we've made. I really don't want to have to start looking again.

Did I mention I don't actually wear dresses very often? At least not anymore. Used to a lot more when I was younger. The last time I wore a dress (it was actually a dress suit) was to interview for the job I have now. That was in April of 2005. Since then? Nada.

So how crazy is all this anyway?!! Well, seems like everyone is making them and they're so darned cute!!! They kept calling and calling to me. So I figured it was time I give them a try again.

Any thoughts?

Sunday, July 22, 2007

Proof of Concept

I've been trying to convince my new fabric that the dress patterns I have already really will work. They've had a hard time believing me though, so I thought I'd try out a proof of concept.


This is Simplicity 6429 done up in the purple paisley from Gorgeous Fabrics. I think I like how it looks.

In case your wondering, I used Corel Paint Shop Pro Photo XI to generate the picture. Here's how:
1. Took the line drawing from the Simplicity site and saved it locally.
2. Cut view C from the drawing and saved it as a separate image.
3. Cut view E from the drawing the layer it on top of View C.
4. Cleaned up the overlap lines a little.
5. Enlarged the combined drawing.
6. Saved a picture of the paisley fabric as a pattern (PSP has a patterns folder just for this).
7. Filled the dress with the paisley pattern. (You may have to enlarge the drawing or reduce the pattern image in order to get the pattern to scale.)
8. Filled in the solid portions with the fill tool. PSP has a nice feature that lets you pick a color from the image you are working on. So I tried a few different colors.

Seems like a lot of work. And I guess it is. But still less work than doing the whole thing up. Now if I can only get it to stretch and bulge in the same places I do!

Saturday, July 21, 2007

Harry Potter and Analysis Paralysis

There's not been much actual sewing going on this week. And there's not likely to be much this weekend either.

Harry Potter B7 is due to arrive any minute, and once that's here all else will be set aside until we know how it all turns out.

On the sewing front, I'm rather stuck in analysis paralysis at the moment.

My family camping/hiking shirt project is on a slow simmer. Only DH's pattern needs to be finished up. The rest are waiting for the PowerDry. For DH's, I just need to work up a muslin to be sure the pattern will work without any more changes. And I'm going to have some time to get that done. Ressy over at Fabrics and Notions let us know that the PowerDry is scheduled to be done at the mill by 9/14. But then it still has to be shipped to Ressy, cut, and shipped out to the coop members. So I'm thinking it will be sometime in October before I can finish out that project. Patience grasshopper.

Now I'm not one to normally have more than one project going at a time, but with that kind of time gap, I'm going to have to make a big exception.

Here's where the AP comes in. To fill the gap, I've been staring hard at two fabrics I got from Gorgeous Fabrics.


I don't keep a large stash, so these two have been berating me thoroughly for not having a firm plan in mind for them. I did have a plan when I ordered them, but once I had them in hand, they said they didn't really care for my plans and that I needed to make new ones.

Whatever I do, they will be completely put out with me if I put them on the shelf and leave them there. They are begging me to turn them into something wearable.

So I'm going to be spending some time trying to hear what these two are saying to me, and trolling through many, many patterns trying to make them happy.

Sunday, July 15, 2007

Kwik Sew 3043 - View C

This weekend I finished up the "muslin" of a T-shirt pattern that I'm working up for DD and DS using Kwik Sew 3043. I finished DS's first (last weekend, actually). Not much to talk about there. I made a size small for him from some waddable white rib knit.

DD's came out quite nicely though, so I turned hers into a keeper. I experimented a bit with finishing the hems differently, and embellished the sleeve edges and neckband with some beads. The beads seem to have dressed a plain T up quite nicely. The "drag lines" in the front are there because she wouldn't stand up straight for the picture. Otherwise, it seems to fit well.

This was my first Kwik Sew pattern. It was a small surprise to pull thick paper out of the envelope instead of tissue! I liked the solidness of it though, and the color coordinated lines (I could see that causing a problem for some people though).

While the instructions were simple and straighforward, they did seem to take more sewing knowledge for granted than some of the other patterns I've used. On this particular pattern, markings were almost non-existent, although every edge was labeled.

This was also my first pattern working with a 1/4" seam allowance instead of a 5/8" or 3/8" SA. That was a little different. I'm not sure I like the lack of wiggle room. If this had been for anything but a simple garment, I would had to have added more SA for my own peace of mind.

All in all, this is a nice pattern. I'm planning on using again many times; primarily for camping and hiking shirts. I'm waiting on some PowerDry I ordered so I can get those going.

In the meantime, I've started on DH's T-shirt version. I'm using Kwick Sew 3299 for that.

PS I got a little more help from DD with her T. I cut the traced pattern and fabric out. She helped with the sewing for just a little bit, then got tired and went on to other things. I'm content with that. I figure if I expose them just a little at a time to sewing, eventually they will pick quite a lot up.

Monday, July 09, 2007

This and That...

First, a few thank you's...

Thanks everyone for your kind remarks on my 1st (sewing) anniversary. I'm looking forward to many more years of sewing fun.

Geek, thanks for your comment on my wrap top. Maybe it will grow on me. I wasn't very pleased with my paisley top when I first finished it, and it's now one of my favorite tops to wear.

But for now, on to other things. I've moved on to the next big thing, which is working up patterns to use for family hiking and camping T-shirts. I'm going to use McCall's 4872, which I made back in April, for myself. I'll use Kwik Sew 3043 for the kids and Kwik Sew 3299 for DH.

I finished a muslin of KS 3043 for DS this past weekend. It went really quickly. I had him help too. He helped me iron the pattern out, tape the pattern and tracing fabric to the table, trace some of the pattern, and cut some of the traced pattern out. Then he ran off and played. He did pretty well considering the normal attention span of your average six year old.

Then I got started on a larger version for 11 year-old DD. I had her do more of the work - she's traced all the pattern lines for her size. I'll go back now and make sure all the marks and lettering are there. Then I'll help her cut it out.

The tricky part will be to see if I can get DH to chip in and help out on his shirt :-O

And why not? He makes me help pack and setup tents and whatnot when we go camping! ;)

I'm hoping to get some nice TNT's out of these patterns. I can see me churning out T's left, right, and center! I'm getting the patterns ready now because I've got some PowerDry on request over at the FabricsAndNotions fabric co-op. I'm crossing my fingers that the fabric arrives in time for me to whip out the T's for the beginning of the hiking season (which in FL starts back up in September or October).

If there's any lag time between getting the patterns ready and getting the fabric, I want to work on another knit pattern. I'm completely loving knits!

Sunday, July 08, 2007

Simplicity 4076 - View A

Well, Simplicity 4076 - View A is as done as it's going to get for now.

The 4th muslin was not really a charm. Technically it's wearable. And even though it's still incrementally better than the previous 3 tries, I'm still not happy with it.

I'm not sure whether my problems stem from lack of knowledge, or whether this particular pattern just does not suit my body type. Whatever the case may be, I wore the finished product to a family get together on the 4th and I had to fiddle with the darned thing way too much. I may wear it every now and again to see if it grows on me.

Bottom line: I've been working on this pattern for quite some time now and as there are other things I want to try out. So while I really like how this has turned out for other folks, I think I'm calling this one done. Maybe I'll come back to it after some time has passed.

Here's what got modified for the last muslin:

- Started with a size 16

- For the back (on each side)

- Added 1/4" to the shoulder for broad shoulders

- Added 1/2" to the upper back for a wide back

- Added 3/8" to the waist

- Added 5/8" to the hem

- For the front (again on each side)

- Removed 7/8" from the bust

- Added 3/8" to the waist

- Added 5/8" to the hem

Note that I used the pivot and slide method for all alterations.

I sewed all hems with a decorative stitch (#21 on Brother CS6000i). The seams were all sewn with my serger. Oh, and I added a snap to the front to help keep it a little more under control.

Saturday, July 07, 2007

1st Year Retrospective

Now that a year of sewing has passed, a short retrospective seems in order.

The following are the sewing projects I completed (or dumped) in the previous year. One note about my sewing habits. I always make a muslin. That is, I always do a "practice" run of a new pattern with fabric that I like enough to wear, but is not expensive enough that I can't afford to wad it. Sometimes, I end up with a garment that I like the first time through and leave it at that.

And with that, here's the list:

Simplicity 8523 (View A) - Finished full muslin only. Didn't like it.
Simplicity 5562 (View C) - Made 3 while playing with alterations. Really like this pattern and still wear all 3.
Simplicity 7086 (View B) - Made 1 muslin. Like it and still wear it.
McCalls M5107 (View A) - Finished full muslin only. Didn't like it.
Simplicity 6519 (View A) - Finished full muslin. Like the pattern, but not skilled enough yet for this one.
Simplicity 6952 (View C) - Made 1 muslin. Like it and still wear it.
Snuglets - Made 8 of these altogether. Mostly for Christmas presents
Sleeping bag liners - No pattern used for these. Made one for each of our sleeping bags
McCall's M4234 (Pants View D and hat) - Made pants for DD and DS and hat for DS.
Vogue 8332 - Finished full muslin only - completely unwearable. This one whooped my hinny. I may try it again someday. But not before a LOT more practicing and learning.
McCall's M4872 (View B) - Made 1 muslin. Like it and still wear it.
Simplicity 4076 (View D) - Made 1 muslin and 1 "for real". Wear them both regularly.
Simplicity 4076 (View A) - Made 4 muslins. The last one might be wearable. The jury is still out.
Simplicity 3743 (View C) - Made 3 for DD. She likes them and is wearing them.

Not too shabby for my first year!

Friday, July 06, 2007

One Year???? NO WAY!!!!

It just occured to me that I missed my 1st year sewing anniversary.

Has is REALLY been a whole year already??? Sure enough, I bought my little Brother C6000i, my first few patterns, and an armful of fabric from WalMart on July 4th of last year.

Unbelievable...

Amazing...

How did the 4th get by me without me thinking about it?

It's been a really, really fun and interesting year. Here's to many many more.

Tuesday, June 26, 2007

Simplicity 3743 - View C

As promised, here is a closer look at Simplicity 3743 - View C.

I made 3 pairs of these for DD to take to camp. The first I made as a muslin. For that I used an olive-colored denim I had already. The only alteration I made to the pattern was to lengthen it by about 2 1/2 inches.

The back fit DD pretty well, but as you can see, the front is on the large side. I didn't really have time to get that taken care of, but definitely will if I make them again anytime soon.

I will also tinker with putting some pockets in, since there were none included.

The other changes I made fall into the category of "embellishment". First, I mock-felled the inseam and the crotch seam. Then, I hemmed the bottoms with decorative stitching.

I used a leaf stitch on the green pair and a loopy kind of stitch on the two tan pairs. If you stand back a bit, the loopy stitch looks kind of like a decorative coverstitch.

This pattern was really quick and easy to put together. I was able to get all three pairs finished by the Sunday before DD left for camp.

Normally, this would be a pattern that I would highly recommend for a beginner, and it might be OK for the top (dunno really, didn't make that), but the bottoms are missing any instructions on how to make the casing for the waistband. I think a beginner might find that disconcerting, although you could get an idea of how to do it by following the instructions for the casing on the sleeve.

I know though that if this had been my first pattern, I would have gotten really confused.

Anyway, here are a couple of shots of the tan shorts and the stitching I did with those.


Saturday, June 23, 2007

Been busy...

Haven't had much time to post this last week or so.

I've been busy sewing (wow! what a concept!).

I've broken one of my sewing rules, but in a good cause as I have made progress on two of my goals.

I broke the rule that says not to have more than one project going at a time. I'm not finished yet with the wrap version of Simplicity 4076. But, I found I needed to set that aside for a bit to run through a quick project for my daughter.

The two goals I got to work on were 1) making something for a family member, and 2) embellishement.

DD is going to camp this coming week and didn't have enough shorts to wear - 2 outfits a day for 5 days are needed. DH and I hunted high and low on the internet and in a couple of brick-and-mortars for just plain old inexpensive, non-jean shorts. We found a couple of nylon shorts at Campmor.com but couldn't find any generic cotton or cotton blend twill-type shorts anywhere.

Seriously. Those that passed the modesty and style tests (no short-shorts, no fashionably ripped or torn shorts, nothing that had any sort of sluttish or attitudinal sayings stamped on the a**) either didn't have any good colors (white pants for a pre-teen at camp?), or the right size wasn't available.

So I decided to make her some. I happened to have a Simplicity pattern (3743) that I purchased recently for the top, but which also had a pattern for some simple elastic-waist shorts.

I got started on them about a week-and-a-half ago and finished up the 3rd pair just now. A more formal "review" will be coming shortly. In the meantime, here's a sneak peak.

Thursday, June 14, 2007

Missing...

A call has gone out in the sewing community to alert folks to the story of a young lady from New York who has been missing since Memorial Day weekend. Here is her story:

Police step up hunt for missing graduate

Thousands of people go missing every year. Unfortunately, only a very few ever get anything more than passing attention.

America's Most Wanted: Missing Persons Resources

Center for Missing and Exploited Children

Center for Missing Adults

Sunday, June 10, 2007

Focus your mind...

I've been thinking lately about how I want my sewing to progress. I find I need some focus, because there are so many things I want to do. It would be all too easy to attempt to do too much at once and not get anything accomplished.

So, here are my top goals, pretty much in order.

Goal #1: Continue to work on fitting issues
My body is definitely not "ideal". And now that I sew, I think I can fix a lot of the problems I've had over the years with RTW clothing (YEA!!!)

Goal #2: Learn how to make pants
This folds right in with goal #1. My non-ideal shape makes it difficult to find pants that really fit. You folks who analyze clothing fit for fun would have a field day with me! :) I've made a simple pair of drawstring capri pants (Simplicity 5562), and feel like the tinkering I did on those worked well. Now I'm ready to move on to making pants with zippers and real waistbands.

Goal #3: Sew more for my family
I really want to get into making things for DH and the kiddies. DH is especially interested in having me try outdoor/camping/hiking clothing.

Goal #4: Embellish, embellish, embellish
After I started sewing, I started paying a LOT more attention to what other people wear. And I've noticed that in many instances, when I say to myself, "hey, I like that", some sort of embellishment is involved.

That's still an awful lot to get done, but trust me when I say that's narrowing it down quite a bit!

So do you have goals for your sewing?

Simplicity 4076 - View A - Still at it

Whew! This one is giving me a hard time. But I'm a big believer in what they call "iterative development" in the software industry. So, I've now finished with muslin #3 and will be moving on to muslin #4. I've made a few changes in each. I'm not going to let this one beat me! :)

Muslin #1
I wrote a little about this one already. But to recap, this was made up as per the pattern with no alterations except to make the sleeves slightly wider. The front gaposis was atrocious.

Muslin #2
For muslin #2, I slit the front pieces diagonally from about the center to the bust point and over lapped them by about 1/2". This helped the gaposis a fair bit, but it was still not "quite right".

I stared at this one hanging on Bessy for a long, long time. And reached a few conclusions:
1. The bust area still had too much ease. Especially compared with the waist and hem area.
2. The arms were too tight - even though I had enlarged them some already.
3. The waist and hem area was too tight.
4. The back right below the arms had something funny going on - I assumed because of the too large bust area. In any case, there were folds there.
5. The gathering on the left side seemed to be gathered too much. It seemed to be pulling things out of place.
6. I'm getting "puddles" of fabric right above my hips in back. It's either due to big booty, or sway back - I'm not sure which.
7. And finally, the front still hung a bit too low.

Muslin #3
For the 3rd iteration, I started with a fresh tracing. I figured that decreasing the bust area, widening the waist and hemline, increasing the sleeve width even more, and changing my technique for the gathering would help some, if not all the problems identified with muslin #2. I made all those changes using the pivot and slide method.

All of the adjustments seemed to help - although some more than others. The waist and hemline could use just a tad more space, and the bust area could be trimmed up just a tad too. Also with the adjustment to the bust, the folds that were in back have gone away. But a "new" problem has cropped up.

The width across the top of the back and shoulders is tight. I think this is what's causing the front to cross over lower than I would like. The shoulder seems are pulling out towards the shoulders a bit, which widens the neckline out, pulling the front more open.

The problem is not really new though. I noticed a similar problem when I made up the Paisley version of View D. The shoulder seems are pulling out a bit on that one too, causing the scoop to be wider and lower than I would have liked, although it is completely wearable. I think it's happening because I had to use one size smaller with this pattern than I would normally use (my size range wasn't available).

I'm floundering a bit on how to solve the problem. I gone back and forth through all three of my fitting books trying to find the best strategy to use. I think I'm going to try widening the upper back portion of the pack panel - and maybe even the shoulder area of the front panel. I'm also going to decrease the bust area just a shade more and widen the waist and hemline just a tad more too.

Maybe the 4th time will be the charm!

Tuesday, June 05, 2007

Apologies for reposts...

My apologies if you are using a blog reading application like Bloglines and you are seeing a number of reposts. I'm trying to clean up duplicate copies of pictures, and in the process the wrong one is sometimes removed. When that happens, I have to re-link the pictures and re-post the entries. You may also see missing pictures from posts for a little while.

Thanks! :)

Sunday, June 03, 2007

Fred the Snake

I've been working this weekend on my 3rd, count 'em 3rd muslin of Simplicity 4076 - View A. I'm having a bit of a hard time getting the sizing in the bust area right, among other things. So many others have done well with this pattern - it's getting a bit disheartening not to have it turn out right.

In the meantime, I came home from WalMart the other night with 3 yards of a snakeskin buttermilk knit from the $1 table - strictly to be used as muslin material.

DS took one look at it and said "Hey, I want to make a snuggle snake." "A snuggle snake?" says I. A snuggle snake.

So I decided to make this a "learn a little something about sewing" kind of project.

First, I had him draw his snake out. I used his drawing for the pattern.

Then I cut the snake out for him. I found some pink fleece scraps from an earlier project and made a tongue for our little buddy. I basted the tongue on one side. Then I had DS help me pin the pieces together. And then we sewed it.

Of course, big sis couldn't stand it. She had to get into the action.

Once we had the snake sewn almost up, we stuffed it (I had tons of polyfil left over from making Bessy). Then I hand sewed the opening up and put some eyes on.


For now, the snake's name is Fred. He's kind of lumpy, and his tongue is on crooked. But DS likes him a lot and the kids and I got to do a nice little Sunday afternoon project together. Who could argue with that? Update: The snake is "Freddie", not "Fred". I stand corrected.

Sunday, May 27, 2007

Introducing Bessy


Remember this little gal from the 1970's? I had one. She and my Pooh Bear were my constant companions when I was little. I LOVED them! She still reminds me of me. Bad fashion sense, red round cheeks, and all.
Well, now I have my own grown up version. My present for Mother's Day was to get help making my own paper tape dress form.

We didn't make it until this weekend due to time and material constraints.

To make the dress form, I mostly followed the instructions as per an article in SewNews: Sewing Stunt Double. I made one big change though - I wanted a dress form with legs since I don't wear dresses all that much. Weddings and interviews have been it as of late. (Although, with all the cute dresses I've seen all the sewists make this year, that may change.)

We started with a fairly large garbage bag and did the requisite shaping with duct tape. To shape the legs, DH slit the garbage back up to the crotch, and then wrapped the cut edges together around my legs.

Then we wrapped the bottom.

Lesson Learned #1: When the instructions don't work, ditch 'em!!

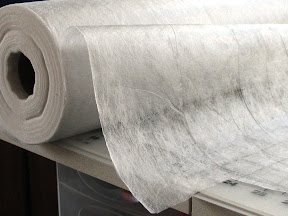
I hunted high and low locally for the "real" self-adhesive paper tape (not the shiny stuff). I ended up buying 12 small rolls of it online.
And after all that effort? The paper tape was great for its firmness, but it did not want to stick to anything. DH would lay some on and it would immediately start peeling back off again. He was getting very, very frustrated. I was getting very, very hot and sweaty.

Our solution? Clear packing tape. That stuff will stick to anything. We put a base layer of clear tape down, then paper tape, then clear tape, etc. and finished of with clear tape. (We also had to use some brown packing tape because we ran out of the clear stuff, but the clear worked much better.)

The down side to this method is that we didn't put as many layers of paper tape as called for and I think that effected the over all firmness of Bessy. I would like to have put more on, but both DH and I were already getting tired by the time we figured out how we wanted to proceed.

Lesson Learned #2: Crank down the AC, turn on a fan and UNLOCK your knees. After about 15 to 30 minutes in just the garbage bag and a little of the bottom wrapped, I started getting really, really hot - fainting hot. So, we cranked the AC way down (72), brought in a tower fan, and I bent my knees ever so slightly. That helped a lot.

Lesson Learned #3: OTC painkillers are our friends. I can't stand in one place for very long without my feet, knees, and especially lower back hurting. After the first 30 minutes or so, I was not feeling great at all. A couple of ibuprofen later and the world was good once again.

The bottom part took the longest to complete. It would have taken a lot less time if we had not done the legs. But I wanted legs so there ya go.

After the bottom was completed, we did the back, then the chest area, and lastly the diaphragm area. These all together took roughly a third to a half of the time it took to get the bottom done.

Lesson Learned #4: Yes, you can still breathe. Warning for the claustrophics out there. Everything was hunky dory until the last part. As soon as my breathing started getting a little constricted, I got a little panicky/anxious. Just stop for a few minutes, realize you can still breathe and that you're not going to suffocate, and soon you will be able to continue.

And here I am all wrapped up.


Then we cut her off.

Lesson Learned #5: When the instructions say to move around as little as possible, they mean it.

Bessy is pretty representative around the legs and hips, but the waist and diaphragm area are out of whack. That would be in part due my efforts to keep my lungs as expanded as possible while being taped up.

I also have either sway back or big bootie (or both) and that was not captured quite as well as I would have liked. We got enough of it though that I will be able to tell when my fabric is pooling around my lower back area.

DS is an artistic photographer with the point of view of a 6 year old (because he is one). He was completely fascinated with the inside of the dress form and decided it needed a few pics too.

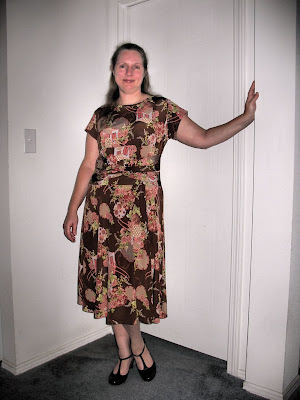
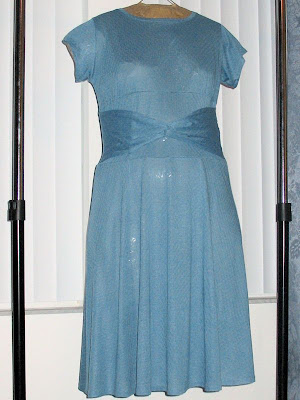
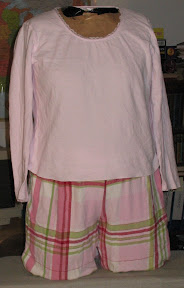
Here we have Bessy with some PJ's on as proof of concept.


And finally, here she is almost ready to go to work. I have to finished the leg, neck and arm edges, stuff her and get a stand for her. I'm hoping that the stuffing will help with her tendency to buckle in the pokie-outie spots. Well see!

Saturday, May 19, 2007

Excellent Customer Service

I live in the boonies - the fabric boonies that is. My nearest source for fabric is WalMart. My 2nd nearest is a smallish Joann's, which is more than 20 miles away. There's really nothing else around for 100 miles or more. I know, I've looked.

As a result, I do much of my fabric shopping online. As my fellow online fabric shoppers are aware, it can be a tricky business at best.

So I want to recognize Ann at Gorgeous Fabrics for her excellent customer service. So rare these days, and so refreshing.

Her site has most of the standard online shopping conveniences to be sure. But sometimes, the real test of excellent and not just good customer service is when something doesn't go quite right.

I made my first purchase from there recently, and the fabric arrived in a timely fashion and in excellent condition, but was the wrong item. The email I sent reporting the problem was not only answered quickly, but also resolved the problem to more than my satisfaction.

No hassles, no questions, no inconveniences. Just a simple acknowledgement of the problem and a commitment to fix it - all with no action needed by me.

I can't tell you how grateful I am to get customer service like that. If every company and vendor out there matched Ann's standards, we would all be much happier customers and shoppers.

So thank you Ann. You can bet your bunnies you'll be getting more of my business.

Sunday, May 13, 2007

Simplicity 4096 - View A - Muslin #1

Hope everyone has had a good mother's day - even if you're not a mother! :)

I got to spend my day sewing. I started Simplicity 4096 - View A - Wrap top a couple of weeks ago and finished up the first muslin today.

I say first muslin because there is going to have to be at least one more.

Lesson #1: Pay attention to those reviews on Pattern Review.

I had read through a number of reviews on this pattern, but the part about there being a lot of ease in this view didn't stick. So, the top part of the top is about 4 sizes to big. Talk about a gaping mess!!!

It's so bad I can't even put a picture of it up - wouldn't be decent.

I did try out an idea for the side gathering which I think I will use again. Instead of using gathering stitches to gather the runched side, I used clear elastic tape pulled relatively taut to create the gathers. I think this worked pretty well and made the gathers more even than I could have done otherwise. I'll take a few pics on the next try to show what I did.

Monday, May 07, 2007

Went Camping Instead

I didn't get to do much in the way of sewing this past weekend. But that's OK. We went (car) camping at a place called Torreya instead. It's a very pretty park with some nice hiking trails.

I try to stick to sewing here, but these pics came out too nice not to share (double click them to get a larger view)...

We took a fairly short hike on Saturday. The trail we went on crossed one smallish stream. There were these little dragonflies flitting near the water. Their wings were jet black and their bodies were iridescent green/blue. Just beautiful.

The main blooming season is over, but there were a few pretty wildflowers to be seen along the way.


Lastly, a little proof that Florida is not completely flat. Only mostly flat.


And now, as they say, back to our (ir)regularly scheduled program! :)

Saturday, April 28, 2007

McCall's 4872 - View B - Complete!

This past week, I picked the final of McCall's 4872 - View B back up and finished it Friday evening.

There's not much to tell on this one. The pattern and instructions are very straight forward.

I did everything pretty much the same way as with the muslin, except that this time I got the neck band right! This time, I used a regular twin needle that I have to topstitch the neck band, and it worked fine.

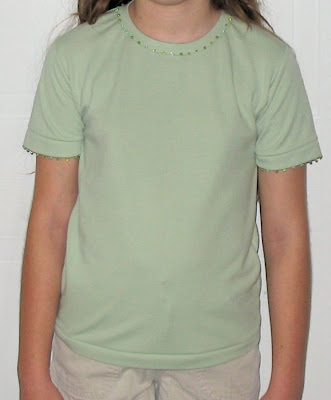
The fabric I used is a stretch knit (97% rayon, 3% lycra) that I picked up from Fashion Fabrics Club. It cost $6.34/yrd with shipping (or $4.95 without). It was not bad to work with - not as firm as the green interlock, not as stretchy as the paisley. It's very soft and comfortable.

All in all, this is a really fast and easy little pattern for t-shirts. I suspect I will be using many, many times.

For my next project, I think I'll try out Simplicity 4076 - View A or B (the wrap version) a try.

Sunday, April 22, 2007

Simplicity 4076 - View D - Paisley version

I finished up Simplicity 4076 using a buttermilk knit I got from EmmaOneSock.

This version gave me quite a bit more trouble than the muslin version.

You can't see it very well in the picture, but the neck line is stretched out compared with the muslin's neckline. It's wearable, but only just. Also, the gathering in front didn't stick very well. It got rather smooshed out. There are still a few gathers there, but they almost look like mistakes, rather than something done intentionally.

There were two things that messed me up. One was the fabric itself. The buttermilk was far more stretchy than the interlock I used for the muslin. I spent quite a bit of time futzing with my needles and tension settings on scraps before I even started. And as I went along, I used various techniques to keep the stretching to a minimum.

Alas, the careful preparation and execution did not quite do the trick this time, in part because of the second thing that messed me up. My serger went wanky on me in the middle of sewing the neckband on. The far left thread tightened on the spool and broke (yes I had the cap thingy on to help prevent that sort of thing from happening) .

I finished serging with 3 threads, but had to go back over it with the sewing machine because the other needle thread was not the right color. That'll teach me to use the correct color only on the left-hand needle. By the time I finished with all this messing about, the neckline had gotten good and stretched out.

I was fairly bummed about it. I spent more on this buttermilk than I have on any other fabric before and to have the first project go astray is a little disheartening. Especially when I had done so much to make sure it would turn out well.

I had everything complete but the hems last Sunday, but dawdled all week because I wasn't happy with how it turned out. But, I finally finished it all up last night and it's grown on me a bit more. I'm still not completely happy with how the neckline sits - the stretching has made the top part a little large. But it's wearable, and that's a good thing.

Sunday, April 15, 2007

Simplicity 4076 - View D - Another win!

Wow, I can't believe it's been so long since I last posted.

The time has been well spent though.

I decided to stick with finishing up the Simplicity 4076 project rather than switching back to the McCalls 4872.

As straightforward as this pattern is, I'm glad I did a muslin with it first. It gave me the chance to do a few tweaks that were needed.

One of the things I needed to check were the alterations I made to the pattern. I had lengthened the sleeves a tad and the overall length by about 2 inches based on my pin fitting of the traced pattern.

Also, I was a little worried about the fit in general. The sleeves in particular seemed a little snug. But knit has more give, so I thought that just a little snug would work out OK.

Lastly, I wanted to test out the techniques I would use on the "real thing".

I worked on the muslin throughout the week before Easter and finished it up early Saturday (4/7). The sleeve alteration worked out just fine. Since I was going to use my serger for most of the seams, I had basted the side seams first, and tried it on just to be sure.

And wound up taking the 2 extra inches in the length back off. The extra length just didn't look right.

Other than that, the pattern worked well. Other people have noted that this particular view of 4076 has a flaw in that the side seam notches don't match up. No biggie since the pattern is otherwise well drafted. It was easy enough to make the side seams line up like they were supposed to.

The muslin turned out quite nice - completely wearable.

So wearable in fact that I wore it that afternoon to a family get together (in-laws 50th wedding anniversary). I hadn't washed it since putting it together, so there I was going about in public with chalk marks in the insides of my clothes! The fabric BTW is an interlock knit (50% Rayon, 50% Poly) that I picked up for $1.99/yd at Fashion Fabrics Club.

Here's a pic of the finished muslin. I spent last week and this weekend working on the "real thing" - a little bit at a time. I'm hoping I can have it finished up this week. (I hope I hope).

Tuesday, April 03, 2007

For the Fashionistas

Don't know why I didn't think of this sooner.

I'm not a huge follower of "high" fashion. It's just never really been my thing.

But for those of you who are, here's a little plug for a friend of mine. He runs an e-bay store that carries vintage magazines called "More Magazines".

Among his vast collection are vintage copies of Vogue, Vanity Fair, McCalls, Redbook, Cosmopolitan, Women's Home Companion, and more.

Each magazine is described in detail, including a listing of all the articles that are in it.

Just quickly exploring this morning, I found an entry for a 1960 copy of Vogue. Here's an excerpt from the e-bay page.

COVER: Suit thinking--are you with it? If you are, there's a new kind of suit, with a new longitude of coat, and a skirt to match. Here, the blazer dazzlement is extended full-length in golden apricot wool imported from France. The coat is piped in white silk shantung; the sleeveless blouse is white silk shantung, too. By Traina-Norell, admittedly Chanel- inspired. Gilt bracelets by Monet. Handbag by Lucille. All at Bergdorf Goodman. The suit, also at Dayton's; Neiman- Marcus; I. Magnin. More golden tones in the new Dorothy Gray lipstick, Jewel of India. Photograph by Horst.

So go have a looksee!

Monday, April 02, 2007

Quick Update

Just a quick update.

We went camping this past weekend, so I didn't get much sewing done. But I did cut out and start assembling a muslin for Simplicity 4076 on Sunday after we got back. I had traced, altered and cut out the pattern for that last week (View D). I should have the muslin finished tomorrow or Wednesday.

In the meantime, the fabric I had ordered from http://www.fashionfabricsclub.com/ came in after we left on Friday. Good thing too, I would have pined for my sewing machine if I had gotten the fabric right before we left, instead of enjoying my outing with my family. This oreder had my 4076 muslin fabric, and my "real" fabric for McCall's 4872.

Not sure what I will do after I finish the muslin. I haven't decided if I will go back to the McCall's pattern and whip that up real quick, or stick with the Simplicity and make that one up.

In either case, these two are quick enough that I think I can get both done by the end of this weekend. It will be nice to have a couple of new tops to put in the closet.

Sunday, March 25, 2007

McCall's 4872 - One for the win column!

Yesterday, I spent the day sewing up McCall's 4872.

This was my first attempt at making a garment using knit fabric, and I'm very pleased with the results.

For this first try, I worked up a muslin using a cheap ($1/yard) knit from WalMart. I think it might be classified as a jersey knit, but I'm not 100% positive about that. The most noticable attribute of this fabric is that it is very thin. Too thin to wear actually. My own attributes don't need that much daylight ;)

I made up view B with just a few changes.

First, I shortened it quite a few inches - maybe 5 or 6. Also, instead of making my normal big arms alteration, I used the XL sleeve on the L bodice. The shirt fit perfectly after these little changes.

I tried making a neck band with the same fabric, and I think it would have worked, except for the part about sewing in on the wrong side. Oooops! I save it by rolling it inside and topstitching it down.

I used my serger for most of the construction including serging the sleeve and shirt hems, turning them under, and topstitching them down. I did a fake coverstitch on the sleeves by running two rows of topstitches with my regular sewing machine (I would have used a double needle instead, but don't have one of those for knits).

(Sidebar explanations for my non-sewing, or beginner friends)

For the longeset time, I didn't know what a coverstitch was. In case you're curious, I'll tell ya. First find a t-shirt. Look at the hem of the shirt or the sleeves. Chances are, you'll see two rows of stitching on the outstide, and squiggly threads on the inside. That's coverstitching. It takes a special machine, or a serger with a coverstitch option, to make those.

So what's a serger? It's a special kind of sewing machine that overlocks and trims the seams at the same time. They've got an OK definition of it at Answer.com. Take a look at the side seams on almost any average piece of purchased clothing, a.k.a RTW - Ready-To-Wear, and they will be serged.

(End of Sidebar)

Lastly, I deviated from the instructions by using a technique called "sewing it in flat" to put the sleeves in. Instead of sewing the sleeve seam together first (making a tube out of it), and then sewing the sleeve to the bodice, you sew the sleeve cap (top) to the bodice and leave the sleeve seam unsewn. Then you treat the bodice and sleeve seams as one and sew them at the same time.

I really, really like this method of attaching a sleeve. My seam intersections come out so much better this way.

Like I said, this try is a muslin. I'm waiting on some fabric to be delivered to make up the "real thing".

In the meantime, I'm getting View D of Simplicity 4076 ready for a muslin workup.

Whew! Busy weekend, but I had a blast!

New Play Pretties

During the past week I've picked up a few new play pretties:
I don't normally buy a lot of patterns at once. But, Joann's was having a $1.99 sale on McCall's, so I ended up with a couple more than I intended.

The Simplicity 4076 is intended to be used with the paisley knit I picked up from EmmaOneSock.
I've not worked with knit before though, so I wanted something simple to start with. I wanted Kwik Sew 3338, but couldn't pick that up locally.

I thought McCall's 5105 would do the trick, but it's not as basic as I thought it was. I settled on McCall's 4872 as my starting pattern, and I think that was a good choice (more on that later).

The Simplicity 4223 is intended for my DD. I've been looking for a style like this in a child's version, but can't find any that are in print. I want to use some pink flower brocade I picked up a while back that's too girly for me, but perfect for her.

McCall's 4922 has been on my wishlist for a while. I've drooled a bit over the versions that folks have made and reviewed on PatternReview.

Lastly there's McCall's 2094. It's not specifically on my wishlist but the style does suit me and I've been wanting to pick up something like it.

Here is my other new play pretty for the week. It is a roll of "Sewing" fabric from Carriff. (I just want to know who in the world thought of using soil separator fabric for tracing patterns and stabilizing fabric).

As you can see, it's quite thin. Very easy to see through for tracing.


One word of caution though. This stuff is porous with capital "P". Everything goes through it. Even pencil. I like it though. I used it this weekend and it seems to be a good alternative to the other tracing materials I've used.