I got rather caught up in an unexpected project.
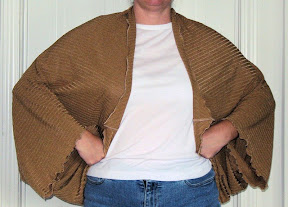
Here is the end result:
 |
| From Wrap it up |

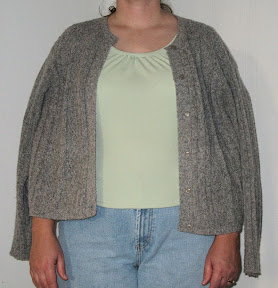
This is a crocheted "shrug", "wrap", whatever you want to call it. The idea for it came from the "two-minute instant shrug" article in volume 1 of SewStylish, and is intended to replace my fugly grey office sweater.

Using their directions, and lengthening a little bit, I came up with this muslin.

I wasn't crazy about the muslin fabric, so I went hunting for something else I would like. I had a hard time finding anything that spoke to me, so I ended up crocheting my own fabric. I'm still not 100% statisfied with the results, but the wrap/shrug is cosy and wearable.
Here's how I made it (I'm not a professional crochet designer, nor practitioner, so take these for what they are):
Row 1. Chain 35.
Row 2. Skip 1st ch, sc in next 34.
Row 3. ch 1, turn, sc in 34 sc through the front loop.
Row 4. ch 1, turn, 2 sc in 1st sc, sc in all but the last sc, 2 sc in last sc, all through the back loop
Rows 5 through 30, repeat row 4, alternating front and back loops so that you always pick up the loop on the same side. This will form little ridges across the work all on the wrong side.
Rows 31 through 53 - sc in all sc.
Rows 54 through 80 - decrease in the first and last sc and sc in the remaining sc.
Finish off.
This will give you a piece of fabric that looks roughly like this:

Fold the piece of fabric in half and crochet or whip stitch along the angles to form the sleeves.
As you can see from the pictures, I did a little extra. I can't explain that part formally though. I made a few spirals with a big glass bead in the middle. I worked those in to the middle rows (the ones that were all the same size) by attaching them at the bottom during one pass, then going around the top and back down during the next pass, then filling in on one side of them, then filling in the other.
One more thing. I didn't actually turn the work as I went. I'm left handed and can crochet left and right handed. So I always kept the right side of the work facing me and switched hands as I went back and forth. This also means that I didn't alternate the front and back loops as the instructions indicated. I always worked the front loops so that the ridge would go to the back.
I'm not even going to get into how I ended up going down this path. It's a long, long saga. Part of it included experimenting with different crochet and knit stitches while on vacation - done because I couldn't drag my sewing machine with me.
I'm glad to be done with this thing so I can get back to my sewing.

No comments:
Post a Comment