Sunday, March 29, 2009

Sewcation - Day 1

The first day of my Sewcation was on 3/16. I started pretty early - around 6:30 am, and finished the day around 8:45 pm. With a break for lunch, a break helping clean out the back fridge, a break to go grocery shopping, a break to cook dinner, and finally a break to eat dinner. Heh heh - it might seem like I didn't have time for sewing at all!

But I did.

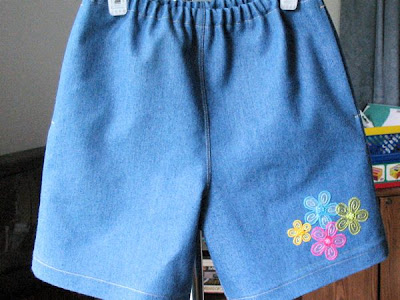
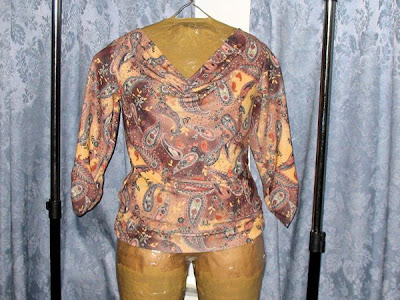
This first day, I started on Simplicity 7086 - View C. I made View B a couple of years ago. It was a project I meant to blog about after I stared blogging, but never got around to it. Here's the original review on PatternReview.com though: Simplicity 7086 - View B. I meant to work View B up again with this really pretty pinkish with little spring flowers on it fabric I found at a local quilting store. But I did not get enough fabric to make the sleeves. So I worked up View C instead.
From Sewcation - March 2009

If you look behind the pattern, you can see my window - it's still dark outside.

When I first used this pattern, I was tracing my patterns onto visqueen. I didn't really like the visqueen very much, so I stopped using it sometime back, and now I use "sewing" fabric (it's actually soil separating fabric) from Carriff to trace my patterns. It took a few hours to get the pieces retraced. Luckily, I had not altered the original pattern any, except to lengthen it by .5". I added the two new pieces needed for the armhole facing.
From Sewcation - March 2009

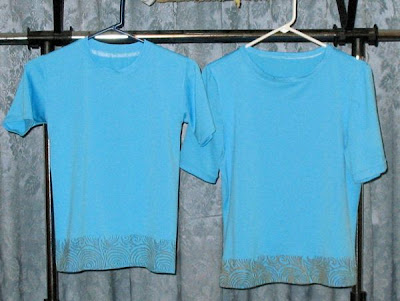
It took me the rest of the day to cut out the fabric (I trace around the pattern, then cut to minimize damage to my pattern), cut out the interfacing, and to get the first dart made.

Here I am tracing around the pattern pieces...
From Sewcation - March 2009

Did I mention I'm slow? I really am.

Here's what it looked like outside my window once the sun came up. Spring has sprung in our neck of the woods, and we have a really nice crabapple tree in bloom.
From Sewcation - March 2009

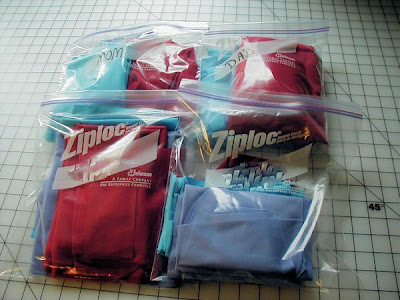
Here we are with all of the pieces cutout. There's still the interfacing to do.
From Sewcation - March 2009

One final pic. My DH homeschools our two children. Afterschool, the younger one, my DS, decided he needed to share my workspace to play with his SnapCircuits.
From Sewcation - March 2009

Sunday, March 22, 2009

March Madness - My Sewcation

Take a look at the "2009 Projects" list to the right. That's the list I started out with for my very first "Sewcation".

I took a week off from work to sew, sew, sew. And it was FUN!!!!

I lost two days going camping with the family, but that was fun too. Otherwise, I spent most all of this past week, and this weekend getting in some much needed sewing time.

I started with 10 things on my list and finished 3. HA! Definitely a case of my eyes being bigger than my stomach. It wasn't for lack of trying though. During the week, I woke up at my normal time, and most days was at it by 6:30 am. I usually didn't call it quits until about 8:30 pm. Seems like a lot I suppose, but there were a number of interuptions. Still, I was able to stay pretty focused the entire time. But I'm also a slow sewist, so there ya go.

Pictures and stories will be forthcoming I hope. I meant to do a blog entry each day as I went along, but I always seemed to run out of time for that. And frankly, I wanted to sew, not blog :-)

Monday, September 01, 2008

Simplicity 3759

I finally finished View B of Simplicity 3759. I swear I think I'm the slowest sewist on the face of the earth!

Here's the final deal:


It took two muslins to get there, but I really, really like how it turned out. I absolutely LOVE the blue paisley fabric (from Gorgeous Fabrics).

Speaking of muslins, the 2nd muslin turned out nicely enough that I spruced it up with some beads so it could be a "wearable" muslin. Made the necklace to go with it too.


Here's the official review for PatternReview.com.
Pattern Description:
Cropped pants or city shorts and knit dress or top, tunic or cropped top and sash.

I made View B - Raglan Tee with gathering at the front.

Pattern Sizing:
Multiple sizes available. I started with a size 18 and adjusted from there.

Did it look like the photo/drawing on the pattern envelope once you were done sewing with it?
Yep.

Were the instructions easy to follow?
Pretty much, although I did not really follow them closely. As others have done, I modified the construction order:
- Attached the sleeves to the front and back
- Attached the neckband
- Sewed the side seams

What did you particularly like or dislike about the pattern?
I like the amount of ease that's built in. It's less form fitting than other knit patterns I've tried, and in this case, it works well.

I didn't like how much the scoop neckline scooped, so I raised it by about an 1". (That's a personal taste thing though - no fault of the pattern).

Fabric Used:
Blue Paisley Knit from Gorgeous Fabrics.

Pattern Alterations or any design changes you made:
- Widened the sleeves, waist, and hips to fit me better.
- Raised the neckline by 1"
- Narrowed the neckband by about 3/8"
- Shortened the neckband by about 1"

I also stabilized the entire neckline using fusible bias tape, as the neckline stretched somewhat during the construction of the muslin.


I got the basic idea for this from here, and altered it to fit the circumstances.

Would you sew it again? Would you recommend it to others?
Yes and yes!

Conclusion:
I really like how this top turned out. The paisley fabric looks great. The pattern is reasonably easy to alter to fit and seems well drafted.

Sunday, June 22, 2008

Quote quiz

A couple of posts ago, I used the quote "Where HAVE you been!" as the title and left it as an exercise to the reader to guess where it came from.

I only had one taker - gorgeous things said that it sounded like something Katherine Hepburn would say.

But, as much as I love Katherine Hepburn, the quote didn't come from her. (Ever see The Philadelphia Story? If not you should. My husband and I like to occasionally torture our children by belting out a completely out of tune rendition of "Lydia". A movie that stars Katherine Hepburn, Cary Grant, AND Jimmy Stewart? How can you go wrong?!)

The quote came from Harry Potter and the Chamber of Secrets (the movie, not the book). It was said by Molly Weasley after Ron and the twins rescue Harry from his uncle's house.

It goes something like, "Where HAVE you been! Beds empty, no note, car gone! You could have died! You could have been SEEN!!" I might not have it exactly right, I'm going from memory. Love that quote! Love the lady they picked to play Molly; she does an excellent job of it.

Well, I guess I should say something about sewing, as this is supposed to be a sewing blog. Lately, I've been working on View B of Simplicity 3759. I've made one muslin, which didn't turn out as well as I would have liked. But I'm not ready to give up yet, so I'm on to muslin #2.

I can't wait though until I get enough experience behind me to move things along a little more quickly. Sometimes it seems like I'm NEVER going to get done with a project.

See ya next time!

Monday, May 26, 2008

A Little Embellishment (the easy way)

One of my sewing goals is to incorporate embellishments - just cause I like them so much!

Sometimes, I can get hung up on doing everything myself. I'm working on a beaded project right now that's taking forever because I'm doing it by hand.

But, there are times when something premade works really, really well.

Case in point. I normally walk by embroidered appliqués because I don't really like how they look. But, I found these really cute embroidered and beaded iron-on appliqués. What I like about them is that they are not fully embroidered, bulky pieces. They are embroidered on the outline only, with beads added in.

I used them to take an ordinary, plain-jane pair of denim shorts I made for my daughter and dress them up very nicely.


The flowers were all separate. I laid them out, then ironed them on per the instructions. Since I don't really trust iron ons to stay ironed on, I used clear thread to tack around the edges.

And here's a close up of the flowers:


These flowers came 7 to a pack from WalMart, and only cost a few dollars. Cool ay?

Where HAVE you been?

Seems like more and more time goes between postings. I'm behind in reading posts too. But, free time is sparse so I spend it on sewing. And I have to fight the rest of the family for the computer - so there ya go.

First of all, thank you gwen and gorgeous things for your recent comments. They are very much appreciated.

So what have I been up to since working on Simplicity 3536 - View A? Mostly working on shorts for my daughter. She's been growing again - so what's new? But, as the pattern I worked up for her last summer was a little large, it still works for her this summer. I had some more fun playing with decorative stitching on the hems, and I played a little with some instant embellishment.

Today I hope to make another sleeping bag liner for the hubby. He's been wanting one made out of silk. I bought the silk sometime back - it's a very nice brushed silk and I nearly kept it for myself - but I'm just now getting around to making it up for him.

After that, I'm not sure. I broke down and bought a few new shirts. Had to - I haven't been able to make up a normal blouse for myself in a while.

Now for a short quiz - The title for this post is a movie quote. Can anyone guess the movie and the character that said it? Here's a hint - it's a very mom kind of thing to say.

Tootles!

Sunday, March 30, 2008

Simplicity 3536 - View A

Here is my more formal review of Simplicity 3536 - View A


As I have done in the past, I'm going to follow the format used for reviews from PatternReview.

Pattern Description:
This is a set of patterns for 3 different knit tops each with 2 variations - so 6 variations total.

I made View A, which has a cowl neck, longish sleeves, and runching at the sleeves and hem.

Pattern Sizing:
Size P5, which is what I used, ranges from size 12 to 20. I started with an 18 and made alterations for fit from there.

Did it look like the photo/drawing on the pattern envelope once you were done sewing with it?
Yes, the results matched the photos and drawings pretty well.

Were the instructions easy to follow?
Yes, I found the instructions pretty easy to follow. I will note, as others have done, that instructions for the shoulder seams and front facing require careful review. Otherwise, they're apt to be misinterpreted. The instructions are good here, it's just a bit of a tricky process.

The pattern itself seemed to be well marked. I didn't notice any obvious mistakes in the drafting.

What did you particularly like or dislike about the pattern?
I LOVE this pattern design - the cowl neck, the runching - all very cute. On the right kind of body. But sadly, mine is not the right kind of body.

My hips are wide, my rear end large, and I have some pooching going on in front. This did not go well with the length and design of this top. The blouse came down below my pooch making it rather visible when viewed from the side. And the length caused the runching to fall around the widest part of my hips. Fabric pooling about my hips is not a pretty sight!

My shoulders are wide, as are my upper arms, but my bust is small in comparison to the rest of me and age is causing my girls to slowly travel south. These things in combination did not work with the top part of the blouse.

The shoulders on this blouse are fairly wide apart, and the cowl plunges pretty far down. The result? A scoop of nothing much showing in front, and nothing really to offset it in the bust area. (To put it bluntly, the top part of the blouse would have looked a lot better if the girls were larger in relation to the rest of me).

Fabric Used:
I only got as far as making a muslin version of this top. For that I used some kind of double knit print from the $1 table from WalMart.

Pattern Alterations or any design changes you made:
I only made adjustments for fit. I widened the sleeves by 2", the waist by 2", and the hips by 2".

Would you sew it again? Would you recommend it to others?
I will probably not sew this view again, although I think I would eventually like to try view C. With my body type, I'm not sure the other views would ever have looked right on me, even when I was a much, much thinner girl.

If I were to sew it again though, I would attempt to make it shorter so the runching falls higher up, and I would raise the neckline some. And if I could figure out how, I'd widen the should seams a little.

I would recommend this pattern to others. It is a nice pattern and it goes together easily. At least, give it a try.

Conclusion:
Very nice pattern, but not for me.

This is (one reason) why I make muslins

I actually started the previous post on muslins more than a year ago, and only got around to finishing it up and publishing it today.

Here's what reminded me of it:


This is my muslin version of Simplicity 3536 - View A. I'll do a more formal review later, but I wanted to address the muslin aspect of this project.

Why? Because I'm stopping with the muslin. I will not be moving on to using the very yummy fashion fabic I had in mind to go with this pattern.

Why? Because after making the muslin, it became very clear that I would not be happy with the outcome.

Who cares? Ummm, I care. Who wants a blouse they don't really like? Actually, I like the blouse. I just don't like how it looks on me!

This particular project reinforces the notion for me that muslins are the way to go. I was pretty disappointed in how this turned out. But no where near as disappointed and unhappy as I would have been if I had "made it for real" and had been as displeased in the results.

Ah, I can hear you now. "But Janimé, isn't this in contradiction to previous posts you've made about not waiting for perfection, or being open to new ideas and experimentation"?

I don't think it's a contradiction. Making muslins is how I keep the door open to new ideas and experimenation, frankly without busting the budget. I can't have too many failed experiments with $8 to $10 per yard fabric, or I won't be able to keep sewing. (YIKES!!!! EEEK!!!! even the thought of not sewing is horrid!).

Muslins, Wearable Muslins, and Test Garments

I wasn't long in the sewing world before I started hearing the words "muslin", "wearable muslin", and "test garment".

So what is a muslin? And why should you care?

The term "muslin" or "making a muslin", generally refers to making a "test" copy of your garment. That is, trying out a pattern with an inexpensive fabric prior to making it with your chosen fashion fabric.

The term originated from the name for a particular kind of woven cotton fabric that was traditionally used to make the test copy. Muslin fabric can still be purchased today and can be used to make muslins, among many other things.

A "wearable muslin" refers to a test garment made with a less expensive fabric than the chosen fashion fabric, but turns out itself to be wearable. I like those!

People make muslins for various reasons, including:
1. Going through the construction process for a particular pattern.
2. Trying out alterations that are made for fit.
3. Trying out new ideas and techniques.
4. Getting a feel for how the finished product will look.

I'm sure there are more.

I always make a muslin prior to using my fashion fabric for all four of the reasons listed above. I'm not nearly comfortable enough with my sewing abilities to pick up a new pattern and try it out on more expensive fashion fabric without trying it first on some good old $1 fabric from WalMart. Witness the fun I had with the wrap view of Simplicity 4076!

I'm also still learning a lot about what will work for me in terms of looks, and what will not work so well. Putting a muslin together helps me understand how a pattern will translate from the picture (usually of someone half my size) to my own wonderful, but definitely not size 3 body.

So should you make muslins? Like so many other things in sewing, it's a personal choice. But it's a choice I highly recommend. The payoff for getting a garment that I truly like is worth it.

Sunday, March 16, 2008

PowerDry T-Shirts are done!

Remember the stack of PowerDry I started with back in November? I finally finished up with it last weekend. Man what a journey!! I made 12 T-shirts in all, one for each family member in Periwinkle, Teal, and Raspberry.

Here's what the stack started like:


Here's what it looked like after I got all of the fabric cut:


And here's what the finished shirts looked like:


Notice two of the shirts have been decorated. I got Paintstiks for my b-day back in January, and used my Teal shirt and DD's Teal shirt as canvas for a little experimentation.


I like how all the shirts turned out. But can you say, "Janimal won't be doing this kind of thing again any time soon"? I had no idea it was going to take me this long to get the shirts done.

They're done now though and I can finally move on to other things. Whew!

Patterns Used:
Kwik Sew 3043 - View D - XS (for DS)
Kwik Sew 3043 - View D - L (for DD)
McCall's 4872 - View B (for me)
Kwik Sew 3299 - View A (for DH)